Page Contents
1. Purpose
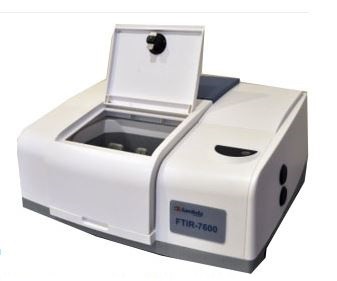
To describe the procedure for operation and calibration of FTIR Spectrometer.
2. Scope
This SOP is applicable for the operation and calibration of the FTIR Spectrometer.
3. Responsibility
Analyst
4. Accountability
Quality Control Manager
5. General Cleaning of FTIR Spectrometer
5.1 Ensure that the power to the instrument is switched OFF before cleaning Clean the instrument with a clean dry cloth daily.
5.2 Operation Instructions of FTIR Spectrometer
5.2.1 Ensure that the instrument is properly connected to the power supply.
5.2.2 Switch ON the main switch and power switch of the instrument situated at the backside panel.
5.2.3 Switch the computer ON by the switches situated on the right of the monitor and PC respectively.
5.2.4 Switch on the instrument, and kept it for 10-15 minutes to get warm.
5.2.5 Click on software & select collect mode
5.2.6 In collect mode you select background & put file name or as per your requirement (in case of DRA assembly put KBr powder).
5.2.7 Now click on ‘ok collect’ so that it will scan background spectra.
5.2.8 After completion of background spectra, put sample pellet (in case of DRA put a mixture of KBr & sample).
5.2.9 Again click on collect & select normal, transmittance mode, and select scanning range (4000-5000 cm-1 or as per your requirement). Select the number of scans (1-20 or as per your requirement).
5.2.10 After completion of scanning you will get a spectrum of the actual samples.
5.2.11 For peak marking click on view & select ‘peaks’.
5.2.12 For comparison with your previous standard just right-click on the main screen & select overlaid or stacked mode as per your requirement
5.2.13 Now open your previous standard spectrum by clicking on file – open trace.
5.2.14 You can also add the data on the screen by right click on the main screen & selecting add text.
5.2.15 For printouts click on file – print & select ‘display current.
5.2.16 Same way you can check no. of samples
5.3 For solids
5.3.1 Preparation of potassium bromide disc: Take about 200 mg of potassium bromide in a pestle and mortar and grind it to a fine powder. Add about 2-3 mg of the substance being examined and again grind to fine powder, Mix well the contents
5.3.2 Clean the Die and its components with soft cloths or tissue paper. Do not use a cloth having a hard abrasive texture to wipe the polished surface.
5.3.3 Ensure that the rubber seal is properly fixed in the groove of the die.
5.3.4 Carefully place the pellets (polished face in an upside position ) into the bore of the cylinder.
5.3.5 Using a clean thin SS spatula, transfer the fine powder sample + Kbr preparation to the bore of the cylinder. Tape the side of die gently so that the powder is evenly distributed across the face of the police face. Insert the second pellet with police facing down.
5.3.6 Place the die assembly under “hydraulic press “ Evacuate the die assembly. Then apply pressure of 10 tons to the plunger to produce a transparent disc.
5.3.7 Remove the die base from the cylinder leaving the plunger in the released position.
5.3.8 Put cylinder bore below the cylinder and place them “hydraulic press” Apply pressure across the plunger until the pellet immerged from the cylinder followed by the disc.
5.3.9 Remove the disc carefully and put it into a plastic tweezer switch is further fixed into the sample compartment of the instrument
5.4 For liquids
5.4.1 Prepare the blank and sample solution as directed in the STP.
5.4.2 Fill the blank /test solution into the cell, preferably with a syringe.
5.4.3 Rinse the cell 2 times with the solution and finally fill the cell taking care that no air bubble is trapped inside.
5.5 For Sample in mineral Oil Dispersion
5.5.1 Take about 200 to 300 mg of the sample in the clean mortar and add about 3 to 5 drops of liquid paraffin (AR grade) and grind it to a fine paste. Mix the contents properly.
5.5.2 Clean the sodium chloride cell with tissue paper mildly so that no fiber /small piece of tissue paper sticks to it.
5.5.3 Hold a cell horizontally and pour 2 to 3 drops of the sample preparation on it and spread it evenly slightly tilting.
5.5.4 Place the second cell horizontally on the first and press it mildly so that it sticks together.
5.5.5 Now place these cells horizontally, inside the window and tighten the screws
5.6 Scanning
5.6.1 Open the sample compartment by raising the left-hand side cover of spectrum one FT-IR Spectrometer and inserting the sample holder into sample the compartment.
5.6.2 Close the sample compartment
5.6.3 Click the scan display on the right sight of the screen.
5.6.4 The spectrum appears on the screen.
5.6.5 Compare the spectrum obtained with standard spectra that are stored in the computer, by proceeding as follows.
5.6.6 Select the file on the top left-hand side then open it.
5.6.7 In open choose the relevant spectra and click the one that is needed. If relevant standard spectra are not available in computer scan standard also with same operation parameter.
5.6.8 Two spectra are displayed on the screen, the test in black color and the standard overlaying it in blue color.
5.6.9 After comparison take the spectra by the print command.
5.6.10 The spectrum is printed by the printer.
5.6.11 Current official reference standard shall be a chronogram and the spectra shall be kept in the file.
5.6.12 These spectra shall be updated once every year /or whenever there change in lot no. of the official reference
5.2 Calibration of FTIR Spectrometer
5.7.1 Switch on the system.
5.7.2 Set instrument parameters as follows.
RESOLUTION 2.0
APODIZATION STRONG
RANGE 4000-400 cm-1
MODE RATIO
NUMBER OF SCAN 16
5.7.3 Allow the instrument to warm for 30 minutes.
5.7.4 Operate the instrument as per operation SOP.
5.7.5 Open the sample compartment cover of FTIR 1600 and place the polystyrene film in the sample holder and close the cover.
5.7.6 Click OK in the SCAN MODE.
5.7.7 The spectrum of the polystyrene film is displayed on the screen.
5.7.8 PRINT the spectrum by going to the print function.
5.7.9 When the printer of the spectra is completely gone to DATA and then to PEAK.
5.7.10 The peak data of the spectra of the polystyrene film is displayed on the screen.
5.7.11 PRINT out these data by going to the print function.
5.7.12 Compare the wave function accuracy with the following limit.
Limit of wave Number Accuracy
3060.0 (±1.5) 2849.5 (±1.5) 1942.9 (±1.5) 1601.2 (±1.0)
1583.0 (±1.0) 1154.5 (±1.0) 1026.3 (±1.0)
Resolution performance of the apparatus
Record the spectrum of the polystyrene film 0.04 mm in thickness. The difference x between the percentage transmittance at the transmission maximum A at 2870 cm-1 (3.48 µm) and that at the transmission minimum B at 2849.5 cm-1 (3.51µm ) should be greater than 16. The difference y between the percentage transmittance at the transmission maximum C at 1589 cm-1 (5.29 µm) and that at the transmission minimum D at 1583 cm –1 (5.32 µm) should be greater than 12.
5.7.13 Record the observation in the calibration record. Affix a “CALIBRATION LABEL “on the instrument.
5.7.14 Report any discrepancy observed during calibration or operation of the instrument to the QA Manager and notify the defect Engineering. Dept / Service. Affix an ‘UNDER MAINTENANCE; label on the instrument.
Frequency of Calibration: – Once in three months and after each maintenance job.
6.0 Abbreviations
6.1 SOP – Standard Operating Procedure
6.2 Kbr – Potassium Bromide
6.3 FTIR – Fourier Transforms Infra Red
6.4 AR – Analytical Reagent Grade
Also, Check,
Waters HPLC Empower software installation Step by Step guide.
Waters HPLC Empower Software Installation Waters HPLC Empower Software Installation Waters HPLC Empower Software Installation Waters HPLC Empower Software Installation Waters HPLC Empower Software Installation Waters HPLC Empower Software Installation Waters HPLC Empower Software Installation Waters HPLC Empower Software Installation Waters HPLC Empower Software Installation Waters HPLC Empower Software Installation Waters HPLC Empower Software Installation Waters HPLC Empower Software Installation Waters HPLC Empower Software Installation Waters HPLC Empower Software Installation Waters HPLC Empower Software Installation Waters HPLC Empower Software Installation Waters HPLC Empower Software Installation Waters HPLC Empower Software Installation Waters HPLC Empower Software Installation Waters HPLC Empower Software Installation Waters HPLC Empower Software Installation Waters HPLC Empower Software Installation Waters HPLC Empower Software Installation Waters HPLC Empower Software Installation Waters HPLC Empower Software Installation Waters HPLC Empower Software Installation Waters HPLC Empower Software Installation