Page Contents
1. Purpose
To provide a procedure for the Operation of High-Pressure Liquid Chromatography.
2. Scope
Applicable to HPLC for routine chemical analysis of in-process & finished products.
3. Responsibility
Analyst
Quality Control Manager
4. Operating Instructions
4.1. Check and ensure that the instrument is clean and calibration is valid.
4.2 Switch on the HPLC System one by one.
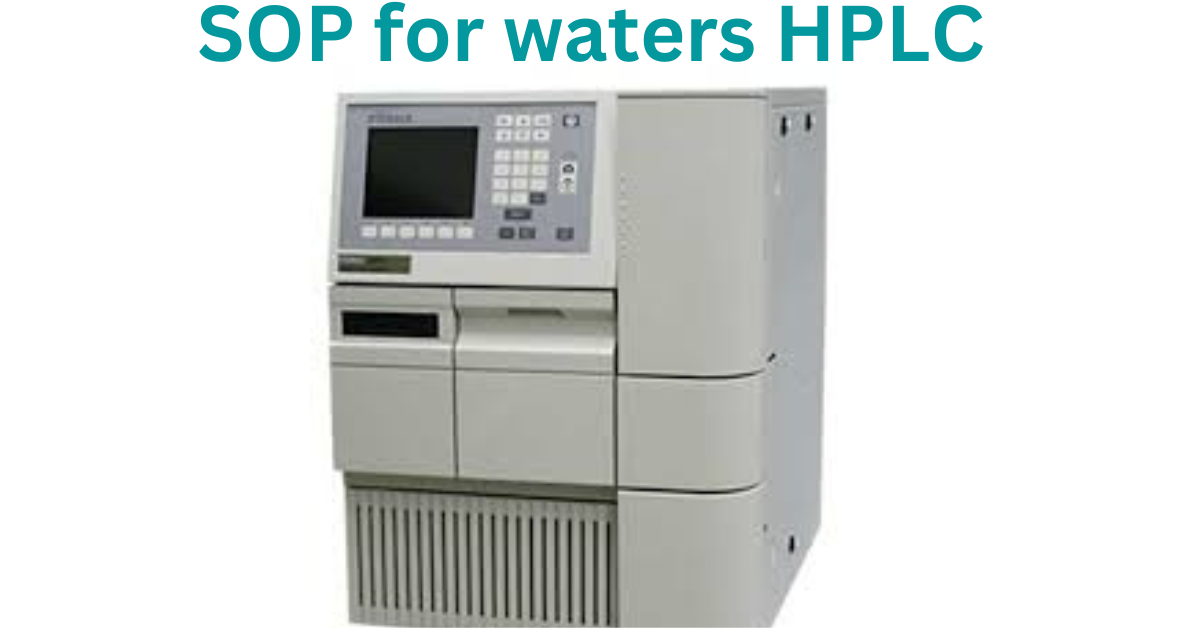
- Waters 2487 Dual Absorbance Detector,
- Waters 1525 Binary Gradient HPLC Pump
- Waters 717 plus HPLC Autosampler
4.3. Then start the computer (Software), wait for a while,
4.4 Login to Empower
- Double-click on the Empower icon.
- For User Name: System, For: Password: ************** – click OK. In the Requested Interface select: QuickStart.
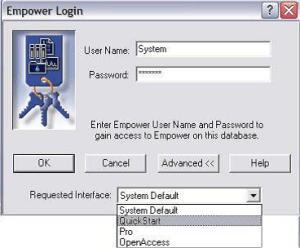
3. Click Ok and select the desired Project and system then select OK. You will be logged into the QuickStart interface of Empower.
4.5 Customizing QuickStart
- QuickStart will be displayed with the “Empower Help – How To” screen displayed”. This is a guided help that will guide you through the complete process of basic acquisition and processing.
- To turn off the Empower How to as a preference, select from the menu bar View – Options. In the “General Tab” deselect “Show Help at Start”, then click on the Acquisition tab and click select “Bring Completed Single Inject into Review”. Select OK. This will turn off the How To help.
- From the menu bar of the QuickStart window-select File – Save Preferences
4.6 Make the Instrument Method
a) Click on the Instrument tab to make a new acquisition method. The View Method will be boxed with the Instrument highlighted.
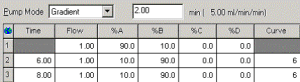
b) Click on the 2690/5 (or other pump icons) of the Instrument method and select:
- General Tab: Notice the column position and Equilibration Time. This is for a column switch valve and column equilibration.
- View the Degas Tab. For most 2695’s the degas are checked.
- Click the Flow tab and enter the desired gradient:
Click on the 2996 icon (or other 2D detectors). Select 2D data collection and fill out the table as desired:
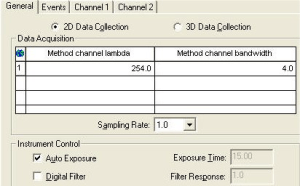
- Select File – Save and enter the name of the instrument method as XXXX.
4.7 Make a default Processing Method and Method Set
a) Click the Processing Method icon. The channels to process will be displayed. This is where chromatogram smoothing, offsets, and math calculations may be accomplished. Select OK.
b) From the menu bar, select File – Save All. You can save the processing method for channel 1 as “xxxx1” and the Method Set as “xxxxMS1”, which contains the instrument method and the processing method.
Note: An instrument method and method set must be created before acquiring any chromatographic data.
c) Click the Method Set icon, and in the table area of the method set, scroll to the right and select the Report column. Select default individual reports for each processed channel. Select File – Save to save the changes to the Method Set as “xxxxxMS1”.
4.8 Make a Sample Set and a Sample Set Method using the wizard.
- Click the icon. If using the same method all the time, then from the menu bar, select Customize – Defaults. For the Instrument Method select the instrument method you just created. Repeat this for the Method Set. Enter the desired default run time and printer preferences. Click OK. Then from the menu bar, select File- Save Preferences.
- Click on New Sample Set Wizard. This will guide you through the basics of making a sample set including optional bracketing. Leave the Sample Set wizard type to LC PDA/MS and select Next.
- Select standard injections to occur at the Start of the Sample Set. Click Next. Leave the calibration options to each standard vial containing a different level. Click Next.
- In the standard bracket area, enter the following:
Number of Standards in each group: x; Number of Injections per vial: x; Injection Volume: x; Run Time: x; Method Set x; Click Options: In the Next Inject Delay enter in x. Click Next.
- In the described samples area, enter the following:
Number of Samples: x ;Number of Injections per vial: x ; Injection Volume: x ; Run Time: x ; Method Set x ; Click Options: In the Next Inject Delay enter in x. Click Next.
- In the Identification, for the standard name, enter in Stan, and in the increment suffix use 1. For the sample name, enter in Soda, and in the increment use a. Click Next.
- Select the Run Mode to Run and Process, and select Next. Review the summary and click finish. The component editor will be displayed. Enter the component names in each standard vial. You will identify the names of the components with the peaks after acquiring the data using the processing method wizard.
- Select OK after entering all component names and amounts.
- From the menu bar select File – Save Sample Set Method and enter in Basic Analysis Set (this will save this table as a template for future analysis).
- Click the Run the Current Sample Icon and select Run. Select the name for the Sample Set. The sample set will start and the Running tab will be displayed with the first sample highlighted in red.
- To see a real-time plot on the top right-hand area, select the Control Panel tab.
- Click the View Acquisition tab twice to toggle between a real-time plot display and turning off this display. This display may be used or not used depending upon the user’s preferences.
4.9 Develop a Processing Method in Review
a. Click on the Browse Project icon. Click on the Sample Set tab and select the desired Sample Set.
- Right mouse click on the table and select View As Channels. This will display just the sample set as individual channels.
- Highlight a standard sample & right mouse and select Review – Replace Data. The review section of Empower QuickStart will be displayed with the unprocessed chromatogram.
- Click the Processing Method Wizard Icon. The first page of the wizard will be displayed. Select Create New Processing Method and click OK.
- Confirm the Processing type is LC, and the Integration Algorithm is Apex Track. Click the Use Processing Method Wizard box, and click OK. Apex Track’s algorithm will detect peaks with a minimal amount of integration events.
- Use the mouse to box and zoom in on the area of the chromatogram that you want peak detection and integration to occur. Click the Next.
Note: To unzoom Right-Click – then select Fullview from the selection list
- The chromatogram will be displayed with the peaks integrated. Since this method is being used for samples that are of different amounts and this is not a regulated company, click Clear Peak and Threshold (this will change peak width and threshold for each sample). Click Next.
- To reject some of the detected peaks, click inside the smallest peak of interest, then click minimum height. There should only be the peaks desired integrated. Click the Next button.
- Select the Method of quantitation drop-down box to select an area. Click in the amount, calibration fit type, and calibration type linear. Click Next.
- For standard LC quantitation, click No in the box asking if you want to use channel names for inter-sample calculations
Note: This is for advanced Internal Standards at different masses/wavelengths than the component mass/wavelength.
- Since a standard was selected, component names will be viewed by clicking on Peak 1 and selecting the proper name from the drop-down box. These component names match the names entered in the Standard Amounts from Run Samples. Click Next.
- Since multiple standard concentrations were acquired, skip the default amounts section and click Next (if a single level concentration was used, you may enter an amount here).
- Select the calibration type to External or Internal Standard. If using an Internal standard, click in the drop-down box to select the component name desired for the internal standard. Click Next.
- Enter the processing method name. Enter in a comment. Click Finish. The chromatogram will be displayed with the processing method applied and integrated.
- View the Processing Method, and select the processing parameters Icon. This will display the processing method you just created and can be used to modify and set up advanced processing functions.
- To view the Main Chromatogram again, select the Main window icon. . Click the Integrate and Calibrate icons to test the processing method. If a sample was selected click the Quantitate icon.
- Click the Peaks tab at the bottom of the Review window and view the result information.
- Right-click on the world icon to set the table properties. Click on any field desired to not be displayed and then Select File – Save Preferences.
4.10 Adding the Processing Method to the Method Set
- Select the Methods Set icon.
- If the Method Set you created before is not displayed, then select File – Open Method Set and select the desired method set name.
- Make sure the Processing Method has been changed in the channel table to the desired processing method for each channel. Select File- Save to save the changes to the Method Set.
- Batch Process the Sample Set using the Process and Report Tool for
2D Data.
- Click the Browse Project icon, then select the Sample Sets tab.
- Right mouse click on the desired Sample Set and select Process ( you may also select injections or channels).
- In the Processing area, click Use Specified Processing Method (or you may select use specified Method Set). Click the drop-down box & select the desired processing method (or Method Set). Click Clear Calibration. In the How: select Calibrate and Quantitate.
- In the Report area, make sure that the reporting box is checked as desired.
- Click OK and the data will be processed and results will be created.
4.11 Viewing Results and view Filters
- Select the Results view. In the Filter by section, select Processed Today from the drop-down box. If all the data is not displayed, click the button to see the results.
4.12 Reviewing and calibration curves results
- Highlight sample results (not a standard), and right mouse click to select Review – Replace Data.
- In the review, the menu looks at the amounts for each peak. Click on the calibration icon and view the calibration curve for each peak. Notice the R2
- Switch to the review main window.
4.13 Preview the Result and view an existing Report method.
- Click the Browse Project icon to switch back to the result table view.
- Highlight the Diet Coke result, right-mouse click, and select Preview.
- In the Preview window, select Use the Report Generated that was generated to be appropriate for the selected Data. Select OK.
- Preview the report and view the data. Save the report as a PDF by selecting the icon and saving it to a desired windows file directory.
5.0 Precautions
5.1 Do not over-tighten connections to avoid damaging them.
5.2 Mobile phase solvents need to be pre-filtered through 0.45 μm nylon or cellulose
filters before use.
5.3 Degassing of solvents is also required prior to use.
5.4 The sample is dissolved in an appropriate solvent, usually the mobile phase,
5.5 Frequency of washing’: Column washing should be carried out after each analysis.
Extra washing should be carried, out whenever abnormal pressure variation or distortion of peaks occurs during analysis.